Showing posts with label fitting. Show all posts

Thursday, December 2, 2010

My body is freakishly deformed

OK, so I'm exaggerating - a lot.  But after having taken Kenneth King's Moulage workshop the first weekend of November, I had some major "OMG" moments.  And I got to hang out with a bunch of great women, too, like EleanorSews from PatternReview.com (and, yes, red really *is* her color!). AND, I got to sleep in that extra hour when Daylight Saving Time ended. What more could you ask for?


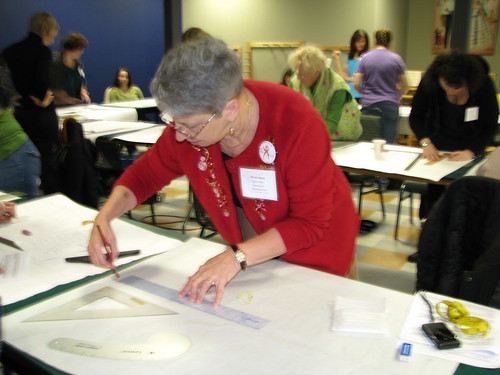
The lovely EleanorSews, hard at work drafting her moulage
The most interesting thing I took away from the workshop was the realization that even though I had surgery to correct my spinal curvature when I was 16, I'm still pretty crooked. Which helps explain the numerous wadders and countless hours of frustration I've had when sewing for myself.

A little background:  My lower spinal curve (the more significant one) was so extreme prior to my operation that I could drop a plumb line from my waist down my left leg without any bulging out at the hip.  My right side had an extremely high, jutting hip bone, which made pants fitting (with my then-teenage fitting skills) pretty much impossible. I also had a curvature in my upper spine, but it was not severe enough to require surgery (or maybe it wasn't back then, I'll give my doctor the benefit of the doubt). After I had the surgery, in which seven vertebrae were fused together, I found myself with matching hip curves.  (Well, not exactly *right* after the surgery...there was that pesky seven months I spent in a body cast - but I digress...)

Fast forward to the moulage workshop in November 2010.  I already knew what my "problem" areas were going into the workshop:  lower right shoulder, long arms and thick waist/high hip curve. (And let's not forget The Girls.) 
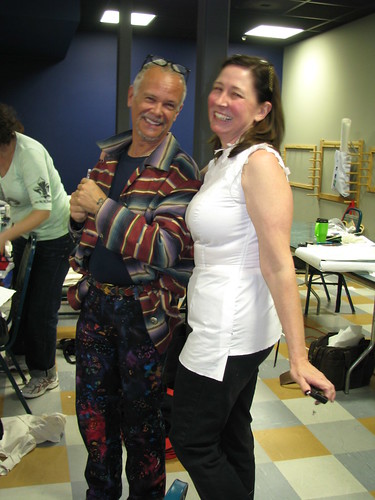
Photo taken just before Kenneth started fitting me. I wish I'd thought to
take one afterward so you could see how much better it fit, but I
couldn't wait to take it off.  He's a very funny guy, and a really great teacher.

Remember that upper spinal curve that didn't get straightened out? Turns out my entire upper body is tilted to the right, like a living Leaning Tower of Pisa.  Not so much that anyone would notice unless I pointed it out (my head seems to be level atop my neck), but my center front angles slightly off to the right side (as if I'm leaning over slightly sideways) *above* the waist, while my CF is nearly perpendicular to the floor from the waist down. It was completely obvious during the fitting process, when Kenneth pinned out wedge-shaped darts across the front and back of the moulage at the waist and above my bust.

For years, I've been taking up extra fabric (about 5/8") on my right shoulder seam, and tapering to nothing at the neckline.  It wasn't great, but was better than nothing at all, or so I thought.  (Silly, silly woman.)  Here's another place I've been screwing up when fitting myself all these years:  when I pinned out excess fabric in a muslin, I would adjust things so I removed the same amount of fabric on both the right and left side, even though (in hindsight) I was pinning out wedges that tapered to nothing on the left side of my body.  I just assumed I needed to take the same amount out on each side, and that I must have done something wrong while pinning out the excess fabric.  Like I said, silly woman.

I felt badly for my partner, Loreen, because my moulage looked not-so-hot before Kenneth started pinning and marking it up. ("It's my *body* that's the problem, not your measuring skills!").  Actually I felt badly for her, having me as her partner - I was nervous, and went too fast, rather significantly mismeasuring her back shoulder width, which caused things to be off quite a bit during the drafting process.  (Sorry 'bout that!)  Fortunately, everything was tidied up during the fitting process.
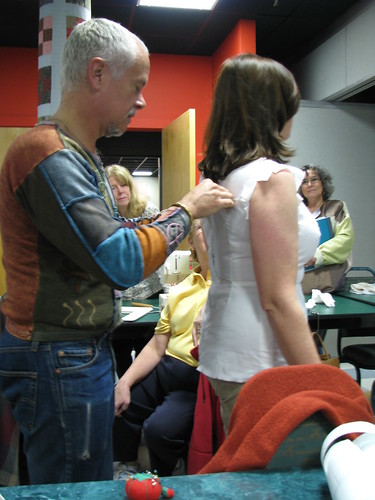
Kenneth King fitting my moulage.


Once I got out of the moulage (and was able to breathe again!), I set to work transferring the markings to the flat pattern. Because of my asymmetry, I had to draft a full front (left and right sides on one piece, rather than one half laid out on the fold) as well as separate left and right back pattern pieces. It didn't take long before I was *completely* overwhelmed by the task, but Kenneth came over and went to work. He is *insanely* quick, and accurate as all get out. Nevertheless, he had to spend a great deal of time on mine.  (I definitely got my money's worth from this workshop!) 
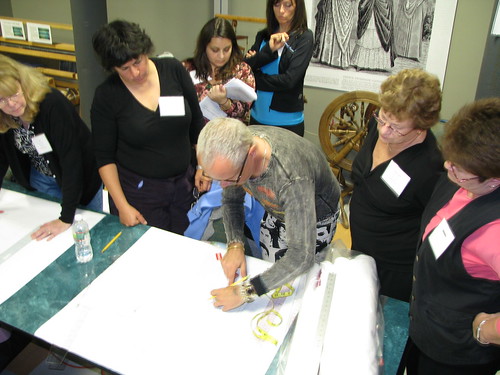
Kenneth demonstrating how to draft the moulage. 

This newfound insight about my body does not bode well for any future sewing involving stripes or plaids, although Kenneth did make a point of telling me how to deal with it:  Use the higher side shoulder line and the lower side armhole depth on *both* sides, and pad the lower shoulder to fill it out to match the higher one.  This way the stripes or plaid patterns will look the same on both sides, and I will appear to be balanced and symmetrical.

Since I had to make separate right and left sides for the front and back, I wasn't able to finish drafting all the slopers before the end of the workshop (we were shown how to add wearing ease to the moulage to draft slopers for a blouse/dress, a jacket and a coat).  Since I got home, I've been able to transfer my moulage to oaktag, and I've drafted the blouse/dress sloper.  I'm hoping to get some time to sew a dress before Christmas (I am dying to make a sheath dress that FINALLY FITS!), but if not, I'll be taking my sewing machine along on our trip to Sugarloaf at the end of the month (my husband and daughter are the skiers in the family; me, not so much).  I'm also going to sew up my moulage using some heavy denim to make a dress form.  Woot!

Monday, September 6, 2010

Oh. This is not good.

I happened across this item online tonight:
"Though Venus defeated No. 18 seed Shahar Peer in straight sets during their third-round match at the U.S. Open on Sunday, the tightness of Venus' self-designed dress clearly gave her issues throughout the match. During most points the tight garment would ride up Venus' hips, revealing her undergarments for everyone to see."
CBS went so far as to later display a "tug count" that tallied the number of times Venus and Peer pulled at their respective dresses following a point. At the time, Venus was leading Peer 42 to FOUR.


At first glance, it looks like a tank-top-over-shorts. But it was supposed to look like this:


Damn.  That is what I call a wardrobe malfunction...

Tuesday, August 24, 2010

Wadder, wadder everywhere...

Sigh...

This has just not been my week for sewing.  On Friday, I tried to finish a pair of jeans (desperately needed jeans, I might add), but ended up with a wadder due to a fisheye dart adjustment I couldn't make without re-cutting the back.  Then yesterday I started sewing McCall's 6153 for my daughter (after spending 40 minutes altering the pattern pieces first), but because I was rushing, I ended up making numerous boneheaded errors, the most egregious of which was stretching the lower fronts/backs to fit the yokes above, instead of gathering them.  The fabric didn't recover after i had finished stitching, so it was completely stretched out of shape.  It's currently in the washer in the hope that it will return to its original shape (it's a teeny, tiny hope).

Next (because I am apparently a glutton for punishment) I got out one of my Unique Patterns patterns, 9024U0, and some fairly heavy tan stretch twill fabric. I figured that I wouldn't have to line the dress since it was such a substantial fabric. Before I started laying out the pattern pieces, I took out my thoroughly-tweaked-to-fit McCall's 2818 pattern pieces and checked the Unique Pattern against it.  The bust points lined up PERFECTLY, so I was encouraged that the rest of the custom drafted pattern would fit well, too.

Turns out the stretch twill was stretchy in both the crosswise AND lengthwise grain.  As a result, the front and back pieces stretched vertically, enough that the dart placement (which had been perfect on the pattern pieces) was completely off.  I tried to salvage the dress by taking out some of the excess fabric at the shoulder seams, and that helped somewhat.  But I still had drag lines at the bust, indicating that I needed a deeper dart.  I am assuming that this is related at least in part to the stretchy fabric as well, but I won't know for sure until I cut it out again in a non-stretch fabric. (Cha-ching!)

Things I learned from all this unproductive sewing:

  • I love my new tailor's chalk; it made marking my darts a breeze.
  • I have several pairs of pants in my closet that I thought fit well, but I now realize need the fisheye dart adjustment as well.  (Guess I've been too preoccupied with my FBAs to pay much attention to what's going on in the back.)
  • Even an "easy" pattern, like McCall's 6153, shouldn't be rushed.
  • The next time I use a knit/stretch fabric, I will check the length when it's resting on the table, and again when hanging (as it will be when worn), then adjust the pattern accordingly if it seems likely to "grow" on my body.
I'm not sure what to work on next.  I still have DD's (now TNT) third and fourth skorts to finish (maybe the reason they're still unfinished is that I NEED to have a challenge?). Or perhaps a little knitting will help me get out of my slump. Tune in tomorrow, dearies, and find out.

Monday, August 23, 2010

Jeans - Part I

So, I started working on a pair of jeans awhile back.  Apparently, it was a LONG while ago, because the McCalls pattern I am using, 5142, is OOP.  I couldn't even find a review of the pattern on PR.


Since I'm trying to replace the dreaded "Mom jeans" in my wardrobe (actually, I chucked the pants a couple months ago, and now have NO jeans at all), I chose the slightly low-rise View C (altered to a boot cut leg), and cut a size 14 out of some stretch denim I had on hand. Things were going along quite nicely; I had assembled the front pockets and fly, and attached the back yoke to the pant legs and meticulously placed the pockets and topstitched them in place. But I ran into trouble with the side seams - since I was using stretch denim, the pants were very loose when I basted the 5/8" seam allowances.  I pinched out the excess, turned the pants inside out, and marked new stitching lines along the pins.

When I tried them on again, something was definitely not right.  The back seemed too wide, with the seam along the outside leg off center.  So I ripped out the stitching and proceeded to pin and baste and try on another five or six times (no, I am not kidding) until I had something I thought was pretty decent.

Then I took some pictures using my camera's self-timer:


Gah!  They were nice and smooth in front, and the outside seam appeared to be centered and perpendicular to the floor, but the butt...I was back in MomJeansville.  Sigh...

I've been reading some back issues of Threads and remembered Kenneth King's "net gain/net loss" adjustment process, so I reached around and grabbed what felt like excess fabric and started pinning it out.


You can see (even in my off-center stance) that the left side where I pinned it looks much smoother than the right side.  And it looks even better from the side:


After pinning and photographing and examining things, I knew there was fabric that needed to be removed, but I had no idea how to go about it.  After spending a few minutes searching online at PR, I had my answer:  I needed to rotate out the fisheye dart I had pinned back there.  Unfortunately, the process required that I remove the excess fabric from the back of the leg and add it back by raising the waist at the side seam and extending the back crotch point.  (Translation:  I needed to re-draft/re-cut my pants.) You can see the effect that pinning had on the center back:

The center back is clearly too short now (I had MEGA plumber's crack when I tried to sit down in these); I think the fisheye adjustment will solve that problem.  I didn't have any more of the stretch denim on hand (did I mention I cut these out a LONG time ago?), so this effectively shut down my jeans production for the weekend.

The good news:  I think I have a solution, and I expect the next go-round to result in ACTUAL WEARABLE PANTS.  The bad news:  I am now noticing this issue elsewhere in my wardrobe.  (I've been a little preoccupied dealing with FBAs until now to pay much attention to the rear view.)  I was getting dressed this morning and pulled on my favorite pair of pants, and I noticed the same problem with them.  Guess I need to add "sew a pair of pants that REALLY fit" to my list of sewing goals...

Friday, December 4, 2009

Back in the saddle again

OK, I kind of fell off the blogwagon for a bit, but I'm back in the saddle once again!

I kinda bailed on the B5300...chalk it up to my Myers-Briggs ESTP type.  (You know, all it takes is for something...Hey, look!  New!  Shiny! Ummm...what was that I was saying? Oh yeah, I have the attention span of a flea.).  In the holy crap has it really been over two months since I last posted, I finished the Kit Kittredge hat for my daughter - in time for Halloween, but then she decided she wanted to be a butterfly princess instead.  (Looks like she has her mama's attention span, too!)


I finally made my way to Unique Boutique in Billerica, MA on my way down to my in-laws for the Thanksgiving holiday and got an updated body scan done.  If you're not familiar with Unique Boutique, it's a fairly new nationwide franchise from Unique Patterns.  For about 15 years now, Unique has been providing custom-fit patterns for women based on their own measurements.  They started out with their own pattern line, then partnered with Butterick (I think, I might be wrong), but then that arrangement didn't work out so now they offer a selection of styles from Simplicity and New Look as well as their own pattern line. In order to receive custom-fit patterns, you need to provide them with a complete set of measurements. You can take your own measurements, or get scanned with the Intellifit® Plus Body Scanner at any Unique Boutique store.  The body scanner uses lasers to accurately (within 1/100th of an inch) measure you from head to toe.

I had my original body scan done about four and a half years ago, just one month after my daughter was born.  What was I thinking?  Not only was my body shape changing on an almost-daily basis, I didn't have the time or energy to sew.  My Unique patterns languished in the closet for months, and when I finally got around to taking them out, I realized that I'd have to alter them as much as I would any other off-the-shelf pattern.  So, back into the closet they went.  Until I finally hauled my butt into the Boston area store the day before Thanksgiving to get lasered once again. 

My new custom patterns (New Look 6952, Simplicity 3962 and Unique 9023 arrived today.  I chose those patterns with the idea of using them as slopers (even though the Unique dress pattern specifically states:  "NOTE:  THIS IS NOT A SLOPER" on the dress that, as far as I can tell, is pretty damn close to a sloper).  The New Look blouse is very similar to the B5300 which was giving me fitting fits.  The Simplicity 3962 is a plain vanilla, dropped-waist fitted straight leg pants pattern that I should be able to modify for jeans, wide leg trousers, etc. If all works out as planned, I should have TNT patterns for shirts, pants and skirts/dresses that I can use for seasons to come.

I'm not sure when I'm going to have time to work on my first Unique pattern, but I'm fairly certain that it won't take me another 4 1/2 years to get around to it.  Oh, BTW, did I mention that I started sewing a Silhouette Patterns blouse?  It's really...Ooooh!  Look!  More SHINY stuff!  I'll tell you more about that soon - I promise!

Saturday, September 26, 2009

Third time's the...third time, I guess

Well, I haven't actually started cutting out a third muslin yet.  I'm hoping to work on this some more tomorrow afternoon (maybe I should make that this afternoon, as it's almost midnight here).  I think I'm going to go back to the original pattern and draft from that one, making the changes that I know are working (moving the shoulder seam back, raising the fisheye darts, petite-ing the upper bodice, lengthening the sleeve), and re-doing the ones I'm not so sure about (splitting the fisheye dart into two darts on each front piece rather than one huge one, scooping out the back armhole, not to mention the bust dart - not only does it need to be shortened, I think it still needs an FBA...arghh!). 

I do know that I am going back to a MUSLIN, rather than sacrificing any more fabric I might actually want to have as a shirt someday.  The busy print of the fabric I was using for attempt #2 made it really difficult to see what was fitting and what wasn't.

And I know I said I was going to post pictures.  I did take them, but haven't downloaded them to my computer yet.  Tomorrow.  I promise.

Wednesday, September 23, 2009

Neckline gaposis - the problem and its solutions

I mentioned in a previous post that I had problems with neckline gaposis - a neckline that doesn't lie flat against your body, but instead ripples out, due to the neckline edge being too long - while working to perfect the fit of Butterick 5300.  I did some research  into what caused the problem and how to fix it, and I've posted the collected wisdom here so it will hopefully will benefit others who are dealing with this problem.

What causes "neckline gaposis"?

Poor pattern drafting - this is where making a quick and dirty muslin can really help.  (Tissue fitting doesn't really give you an accurate picture - it's best to test the fit in a muslin) Also, the larger your bust and the lower/more open the neckline is, the greater the gaposis is likely to be, so folks who alter their pattern pieces with an FBA should always check the fit with a muslin first.

Over handling the fabric - because necklines are almost never cut on the grainline, they have a tendency to get stretched out as you are working with them.  To prevent this, stay stitch the neckline edges as soon as you can after you cut out your fabric. (For years I was guilty of just skipping this step in my rush to get to the "real" sewing.)  If you are using neckline facings that are interfaced, fuse or baste the interfacing to the facing pieces ASAP.  After sewing facings to the neckline, measure the neckline distance and compare it to your pattern to make sure that it hasn't "grown" on you. (If it has, a good option is to use solution #4 below.)

How to correct "neckline gaposis"

The following links provide information on various ways to deal with neckline gaposis:

1. Eliminating gaposis by shortening the neckline length
2. Shifting the pattern's center front line - or - rotating excess length into a dart (or increasing the size of an existing dart)
3. Taking a deeper shoulder seam allowance (refer to the third paragraph)
4. Easing the neckline edge

(If you know of any other methods or references I should add to this list, please let me know in the comments - thanks!)

Tuesday, September 22, 2009

The Perfectly Fitting Shirt - Part II

The first draft of the pattern with the modifications I talked about in my previous post is done, and I have some good news and some bad news.  The good news is that the shoulder seams now follow my shoulder line perfectly, the sleeves are a better length, and the pointy darts don't seem to be that much of a problem.

The bad news is that the bust darts ended up WAY too low on this second attempt. When I drafted the new front pattern piece, I lowered the dart by first tracing the CF, neckline, shoulder and armhole, then I slid the tracing paper up 5/8". Next, I traced the bust dart, using the endpoint of the size L dart, and connecting to the ends of the M dart legs at the side seam. On the original pattern, the L and XL darts ended quite a bit further away from the bust point than the XS-S-M darts did.  (This made absolutely no sense to me, as I was working with a D/DD cup front piece - all of those smaller sizes should have had their darts end further away from the bust point based on the cup size.) When I tried on the second muslin, I could immediately see that the darts were too low. I pinned out about an inch on each of the shoulder seam allowances, which moved the darts up to where they should be, and also made me realize...that I really needed to petite the upper back.  Sigh.

So what I need to do for Version 3 (god, but that's depressing to write) is take a 7/8" tuck in the upper front and upper back pattern pieces, then lower the armhole by about 7/16" (I want a slightly closer fitting armhole), re-draft the front neckline edge and, finally, re-draft the sleeve to take out some of the now excess sleeve cap ease. (I'm thinking of folding a long vertical dart in the center of the sleeve so the cap height remains more or less the same.)

Also, I noticed an error on the original pattern when I measured the sleeve width at the bicep while I was drafting the new, longer sleeve.  Although the width printed on the pattern for the size M said 16 1/4", my measurement (through the crosshatch mark and not including the 5/8" seam allowances) was only 15 3/4".  To me, a half inch difference is a significant one, and something that should have been caught during the drafting process.
 
So I'm back to the drawing (drafting) board this afternoon, and on to muslin #3...stay tuned!

Monday, September 21, 2009

The Perfectly Fitting Shirt - Part I

As I do this time each year, I went through my closets and drawers to identify what I have and what I need to complete my fall wardrobe.  I have pants and skirts galore (OK, more like eight to 10 of them), and several dresses, but very few shirts (and even fewer shirts that fit me well).  I have decided that my priority for sewing has to be developing a TNT blouse pattern so I can whip up a half dozen or so new shirts for the fall (which officially starts tomorrow, BTW, so I'd better get cracking).

After reading several reviews (in particular, Debbie Cook's - you're fabulous!), I have decided to use Butterick 5300 as my starting point:

Like Debbie, I find the Connie Crawford patterns rather "blah" at first glance.  The sketches really don't do her designs any favors. I was looking at some of her patterns on her website yesterday, and I was really impressed with the photos of live models, particularly the ones that show the same design on two different size women.  I think Connie really has a gift for plus size designing - the clothes look just as wonderful on "fluffier" women as they do on the more slender gals.

For my first attempt, I used a lightweight, taupe-colored linen (or maybe linen-look, I can't tell) fabric from my stash.  I figured if I really got lucky, I'd end up with a "wearable muslin" (sorry, Ann!).  In any event, it wasn't doing anything just sitting there in my stash, so I figured it might as well be used for something.  I chose View C, which has a faced V-neckline and 3/4 length sleeves with slits at the hem, and started with the D/DD front pattern piece.

I have to say that it fit pretty darn well right out of the envelope compared to most Big 4 patterns, and had I made no adjustments, it would probably fit as well as or better than most of the RTW shirts in my closet.  However, since my quest is for the Perfectly Fitting Shirt™, I started tweaking it.

I had a bit of a problem with the front neckline gaping (which I plan to address in more detail in another post).  It was particularly noticeable on the right front, because my right shoulder is lower than my left (thank you, scoliosis!).  To correct this, I'm going to take a little wedge out at the shoulder seam, tapering to nothing at the shoulder point, which falls exactly where it should be.  Additionally, I noticed that the shoulder seams are clearly visible from the front - they need to be moved towards the back, which means adding length to the back and back facings, and removing length from the front and front facings.  Again, since the shoulder point is in the correct location, I need to add/remove wedge-shaped pieces of fabric, about 1/4 to 3/8 of an inch (for left and right fronts, respectively).  Since I am planning to use this pattern again, I'm going to draft separate left and right fronts (and left and right front facings) so I don't have to fiddle with the right side adjustments each time I use it.

The bust darts are a little too high, and too close to the bust apex.  I need to shorten them by about 5/8" and lower them by the same amount. I'm a little nervous about shortening the darts - they already end in a rather sharp point, but I was able to press the point into a smooth curve on the linen fabric.  I'm concerned that shortening it will increase the angle of the dart, and depending on the fabric I use, it may be harder to press into a smooth, curved shape.  (Does anyone have a suggestion as to how to handle this?)

I should have taken Debbie's advice about the fisheye darts on the front pattern piece right from the start - they were indeed far too close to the CF.  Both the front and back fisheye darts need to have the widest point (waistline) raised about 5/8 - 3/4".  The total length of the darts seems OK, but the pattern's waistline is lower than my narrowest point.  I haven't quite decided if I need to petite the pattern through the upper back as well.  I  like the length of the unhemmed shirt, so I'll need to add another inch to the fronts and backs for hemming.

Finally, the sleeves could be longer.  I usually need to add an inch (or two) to full-length sleeves, and the 3/4 length ones were no different.  I made the mistake of taking out 1.5 inches in the width of the sleeve the first time I cut them out because the finished biceps measurement printed on the pattern was 2.75" larger than my arm measurement, and I thought that would be too much ease.  I generally prefer closer-fitted sleeves, but after trying the sleeves on, I realized that my arms really need the total amount of ease for movement.  I thought the amount of ease in the sleeve cap was reasonable, and the sleeves were fairly easy to set in to the armhole, even though the pattern has you sew the underarm seam first and set them in "in the round".

I'm going to re-draft the pattern this afternoon and take another swing at it in a different (non-muslin) fabric.  Wish me luck!